New Virtual Machine
In this simple guide I’m presenting how I’m usually setup my virtual machine for another Oracle Database test. Enjoy shiny screenshots.
Introduction
Starting point for this article is presented in a table below.
| Attribute | Value |
|---|---|
| Install media |
Virtual Box 4.3 – Virtualization software (VirtualBox-4.3.10-93012-Win.exe with Oracle_VM_VirtualBox_Extension_Pack-4.3.10-93012.vbox-extpack) You can use latest version you can find on Oracle site |
| Hardware (your host machine) |
General: Windows/Linux (Virtual Box is available for both platforms) System: RAM: at least 4GB, 2 CPU cores, Hardware Acceleration for Virtualization (enable in your bios if you have it, like: VT-x/AMD-V) Display: Video Memory with at least 64MB of memory Storage: at least one hard drive for virtual machine virtual disks, 80GB+ is recommended – remember, we will use thins (dynamically allocated files) Network: network card or virtual network from Virtual Box |
Virtual Box installation
Download installer and follow wizard steps. During installation choose where your software goes and then, after the installation, configure default directory for your Virtual Machines. You can find this property using menu inside the application: File > Settings and there on the first tab you can find property for default Machine folder. Change it to more usefull directory like c:\VirtualMachines\ .
Create Virtual Machine with Wizard
We’ll start with default wizard to set basic parameters and first hard drive. Then we’ll customize our Virtual Machine. Main goal is to get simpe host with couple hard drives for Oracle Database installation with ASM on board.
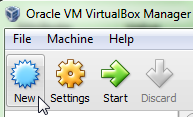
Start the process of creating new Virtual Machine using this button.
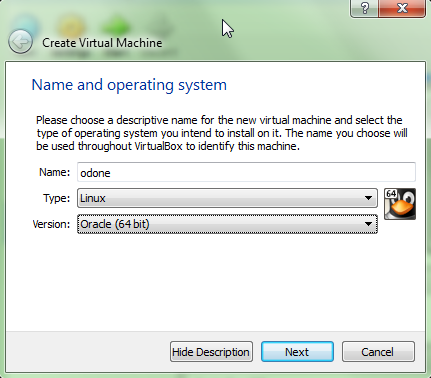
Input your Virtual Machine name – use simple name without special character as this name will be used as default subdirectory for hard drive files.
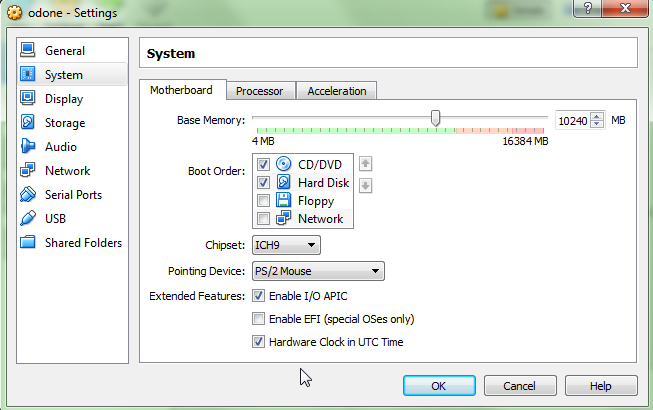
I have some spare memory – if you haven’t got spare 10GB of memory use at least 1920MB to be sure that all will start on your virtual host.
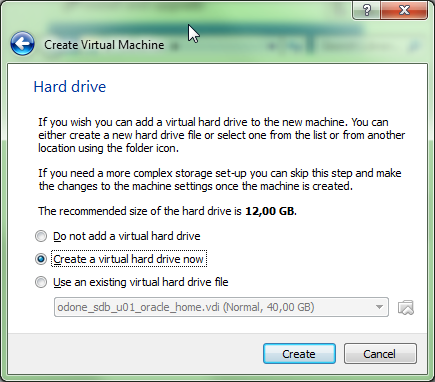
Create your first virtual hard drive.
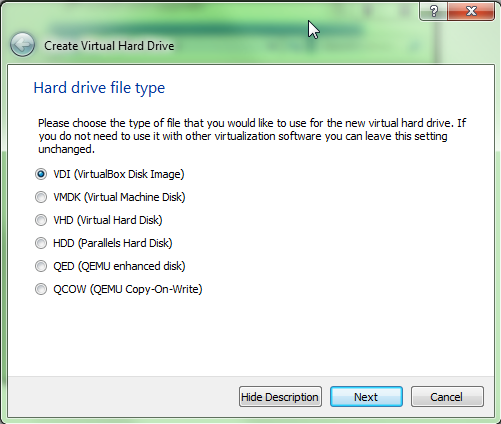
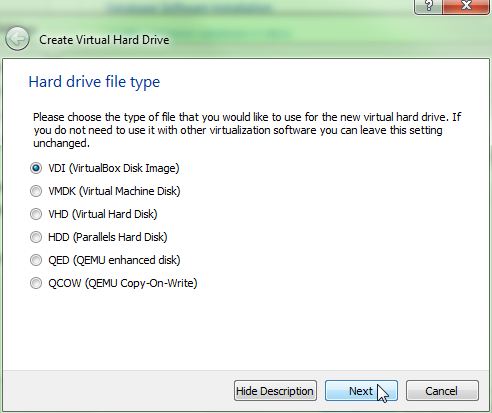
Format is typically VDI as this is the default now. The best option for all-round use in Virtual Box.
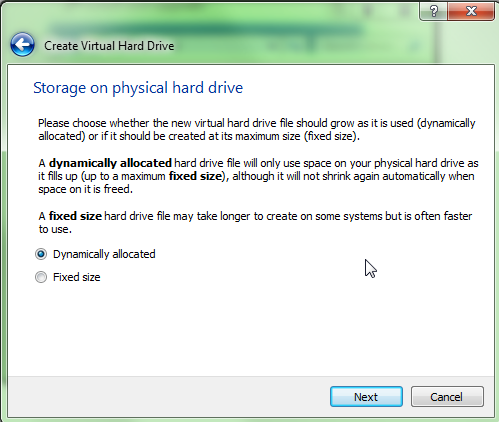
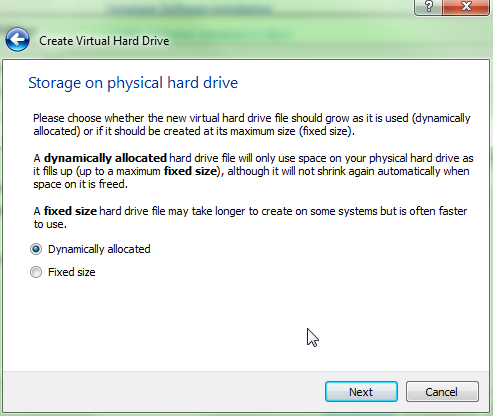
Choose to dynamically allocate space – creating from start your virtual hard drive with allocated space could give you some better performance but – if it’s your only hard drive you might want to do not waste any space only for virtual free space.
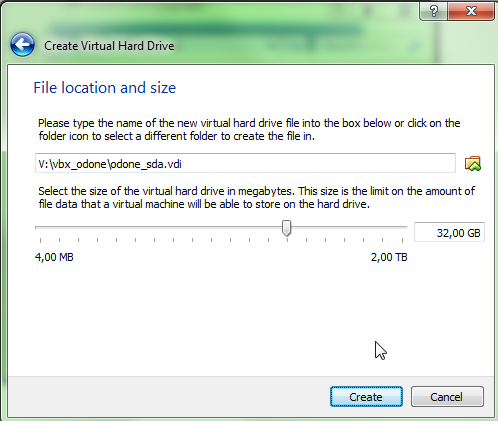
Size of the hard drive that will be visible within your Virtual Machine. First disk for operating system with Oracle Linux 6.5 should be declared as at least 32GB. In my case I’m counting 10GB for swap partition and another 10GB for operating system related files. Another 12GB as a an error margin. It’s totally thin drive so you don’t need to worry for declared size. After changing settings hit Create button – this will end this wizard and we can move forward to configuration.
Edit Virtual Machine settings
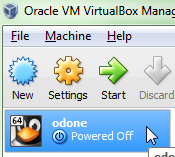
After creating first hard drive you’ve reached the end of wizard scope and you can see a new icon in your Virtual Machine list in Virtual Box. Choose Settings button to edit Virtual Machine configuration.
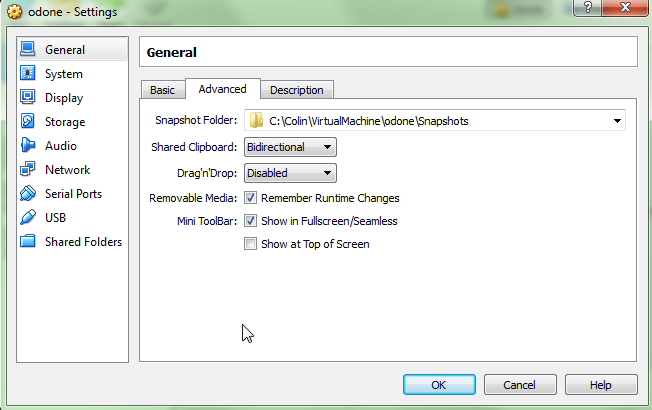
Enable shared clipboard – this will be used only after Guest Addition Software installation. Check each field for differences from this screen up till the end of this guide – if you’ll notice that you don’t have enough memory/cpu cores/other values then check documentation how to deal with the problem. Most of the time you need to choose lower value and that’s perfectly normal. If you have more spare resources – you can always add more memory or CPU cores – it’s up to you – here you can see how I do it and create the same environment which will be good enough to check my other guides on this site.
Adjust System tab.
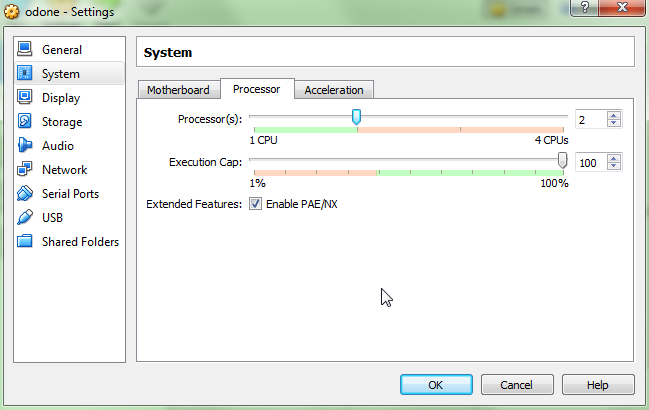
In my host I’ve got 2 cpu heads with 2 threads each. It’s safe to set Virtual Machine to use 2 threads and do not set cup below 80%.
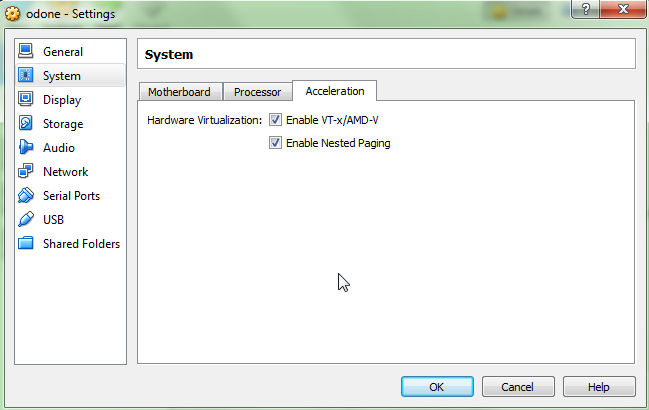
If for some reasons your Virtual Machine hangs or throw an error on screen during start then check those options – they should be used and if you still have an error check your bios for virtualization settings and enable them. They should be called similarly to those options on image.
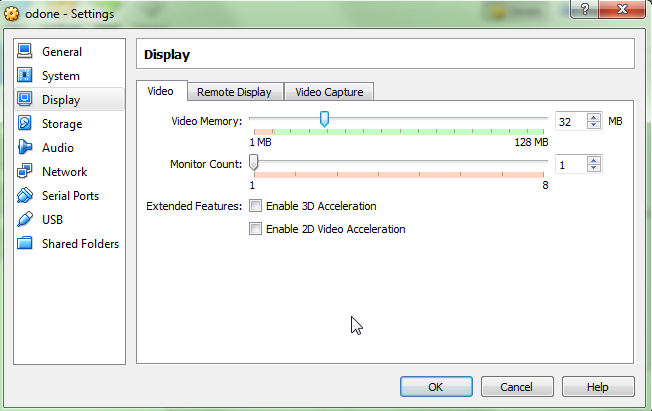
More Video Memory is required for higher resolution if you’ll use X inside in your Virtual Machine with Virtual Box console. I’m always using at least 32MB.
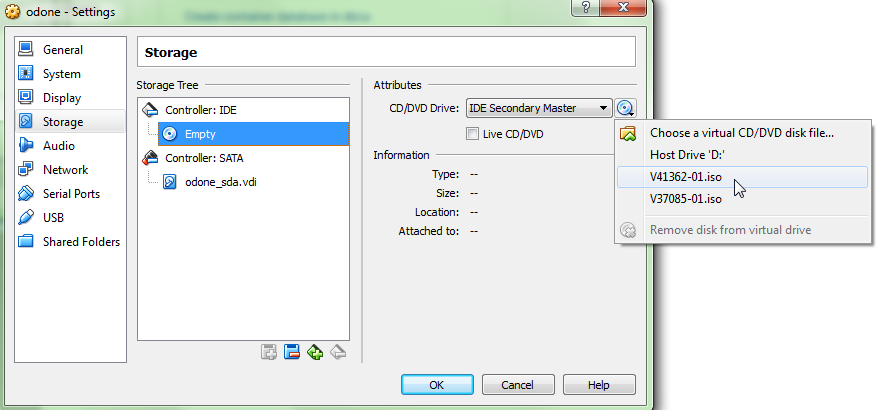
Here we can set configuration up for Virtual Drive and insert a DVD with operating system – in my case it’s Oracle Linux 6.5. Choose first option from drop-down menu to locate your iso file on host disk drive.
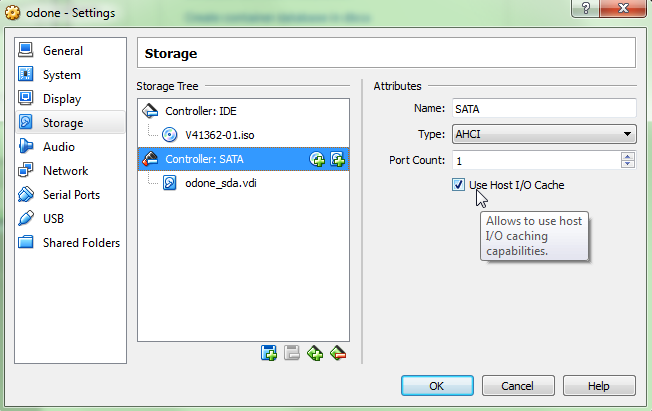
Enable I/O Cache for the whole controller.
Adding another disk drives
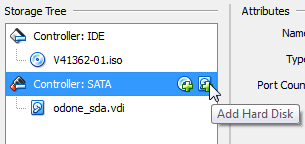
Select icon with hard drive and plus sign in-line in your Storage Tree to add another hard drive.
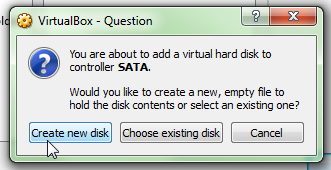
Create new disk for Oracle Home directory.
Just like last time – choose VDI format.
Dynamically allocated.
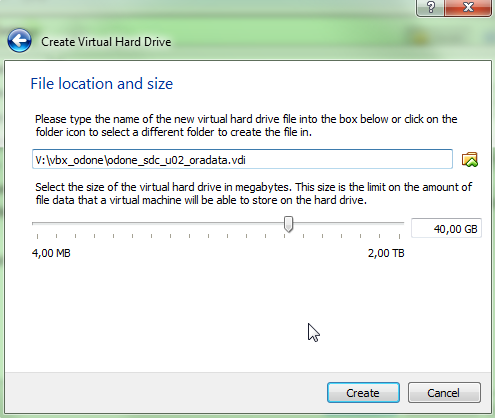
Choose names for your vdi files with some meaning – later it’s not so easy to find out each disk role within your Virtual Machine. 40GB is a must for 12c with Cloud Control.
Repeat above steps for adding a new hard drive for your SATA controller but in last step use different datafile name and size – you can go back to the beginning of this section (Adding another disk drives) and start with an icon of the hard drive with plus sign. On a couple of next slides you can find details about rest of my disks which I’m going to use during tests and preparing further guides.
Second disk is for filesystem database files. 40GB is a good start.
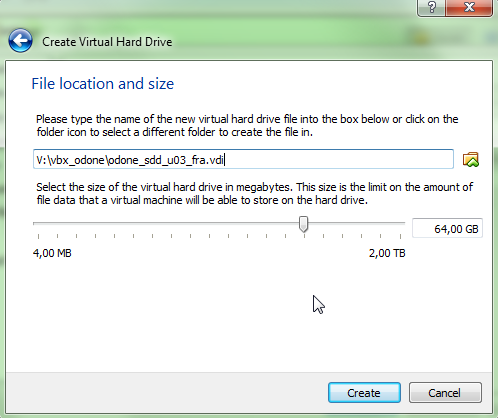
64GB for FRA area.
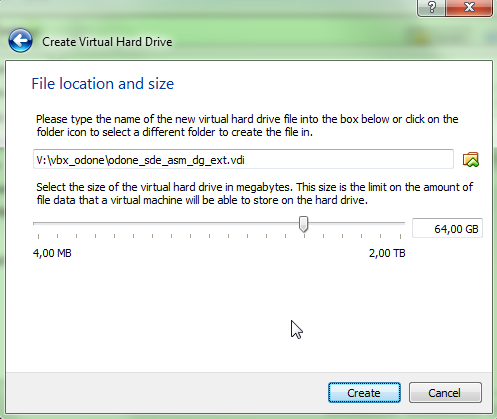
And another declared 64GB for your ASM hard drive. I’m going to use external redundancy for my test environment.
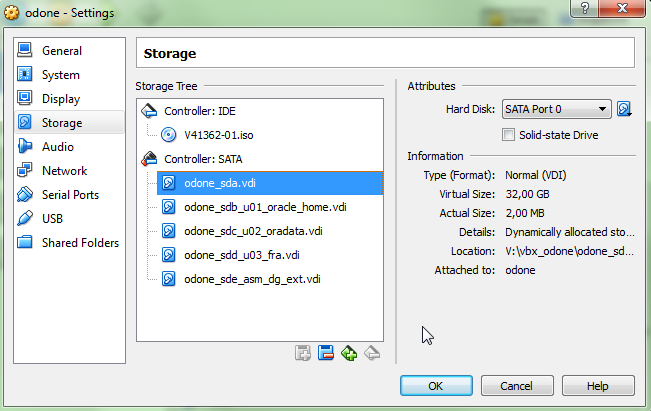
Summary of my hard drives. You can set it differently according to your needs.
Finishing configuration
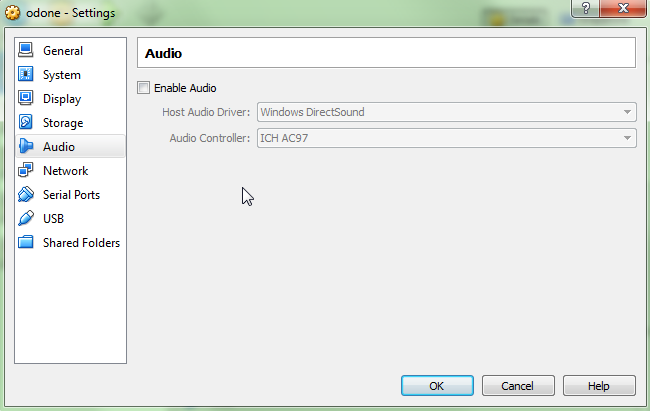
Disable sounds – most of the database servers do not feel the difference between fun noise and good Rock&Roll 😀
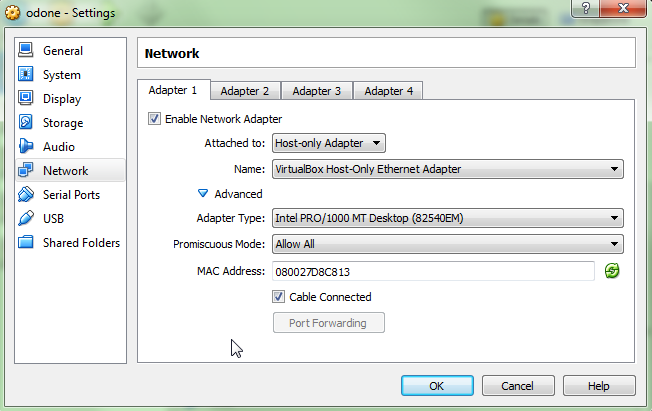
Network configuration for local connections. I’m not going to use internet within this Virtual Machine and maybe one day I’ll start another Virtual Machine with some other OSes for different scenario than standalone installations.
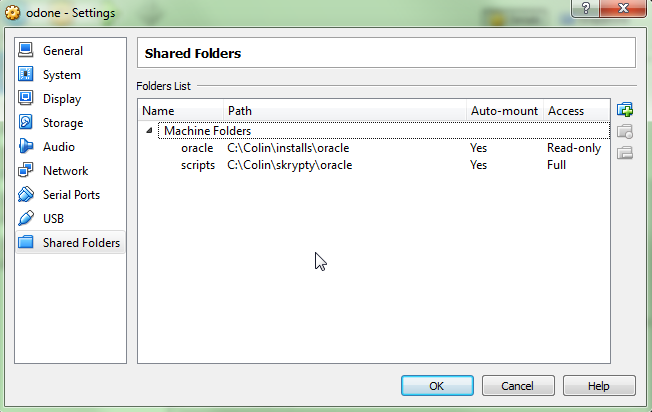
Shared folders. For sure you need a directory with Oracle Media if you want to install it – add as read only auto mounted. Second directory as a buffer between my Virtual Machine and local host. It’s going to be enabled after you’ll install Guest package.
Conclusion
With virtualization comes ease of preparing machine which can be used as a test environment with a database – this is essential for any DBA. You don’t need to buy expensive server, switches, storage arrays and configure it together to develop your skills in your home lab. Today you only need a PC with some spare physical memory and space on your hard drive. You can use snapshots to have the ability of enterprise solutions feature to restore your host state to point in time. Use Virtual Machine as your home lab and in no time you’ll be doing the same on production hosts for a money which is not so virtual as your test environment.


its useful… information that how to instal a virtual machine.
thanks for posting..